The USBMAS drivers have been updated for Windows 7 (32-bit and
64-bit) and above. The installation procedure is not as
simple as for WinXP and older versions, particularly for Windows 7
64-bit. This documentation is intended as an installation
guide.
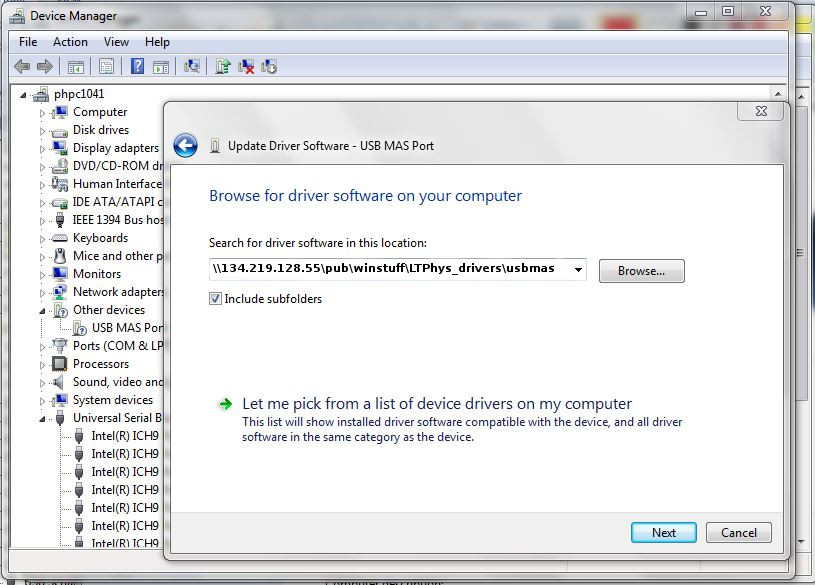
The driver files are accessible directly over the network at
Microsoft networking UNC \\134.219.128.55\pub\winstuff\LTPhys_drivers\usbmas
or via ftp to copy at USBMAS
drivers. Note: copy&paste the above
UNC into the file browser when prompted here.
The first problem is that a Windows 7 machine will probably have
automatically installed default drivers for the FTDI USB chip used
in the USBMAS boxes, downloading them from Windows Update, when
the USBMAS box was first plugged into the PC. If so, these
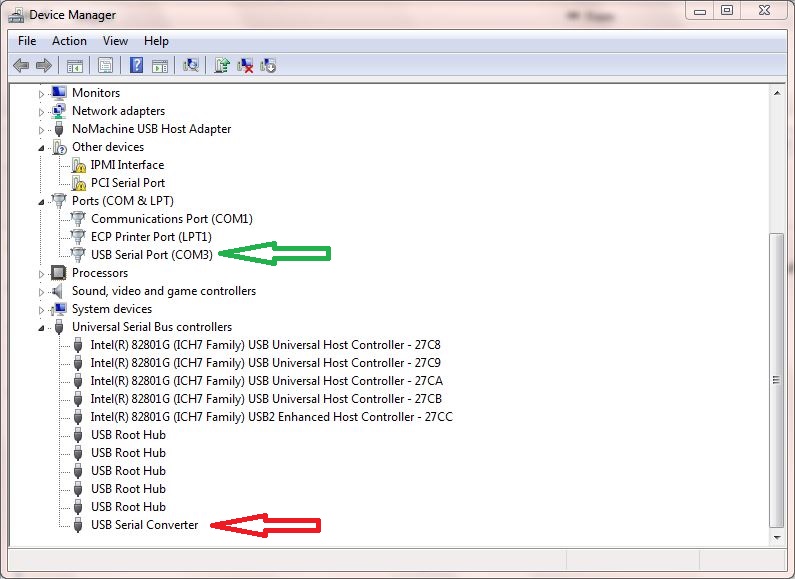
must first be uninstalled. Navigate to Control Panel -->
System --> Device Manager. The RED
arrow shows the auto-installed USB Serial Converter
driver and GREEN arrow the virtual
serial port USB Serial Port (COM3) on which it
depends. These will only be displayed with the USBMAS box
plugged in to the PC.
Right-click the USB Serial Converter item to start the
uninstallation procedure as shown below.

Continue as shown here.
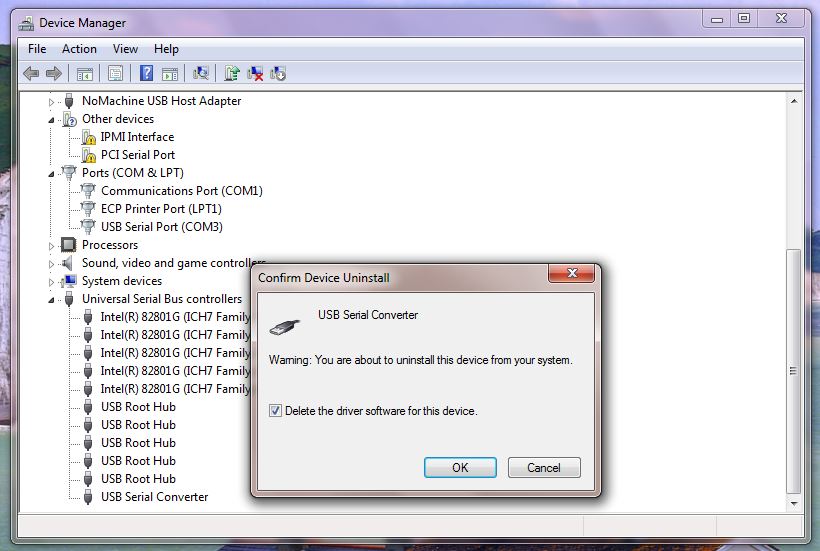
Be sure to tick Delete the driver software for this device
tick-box. Click OK.
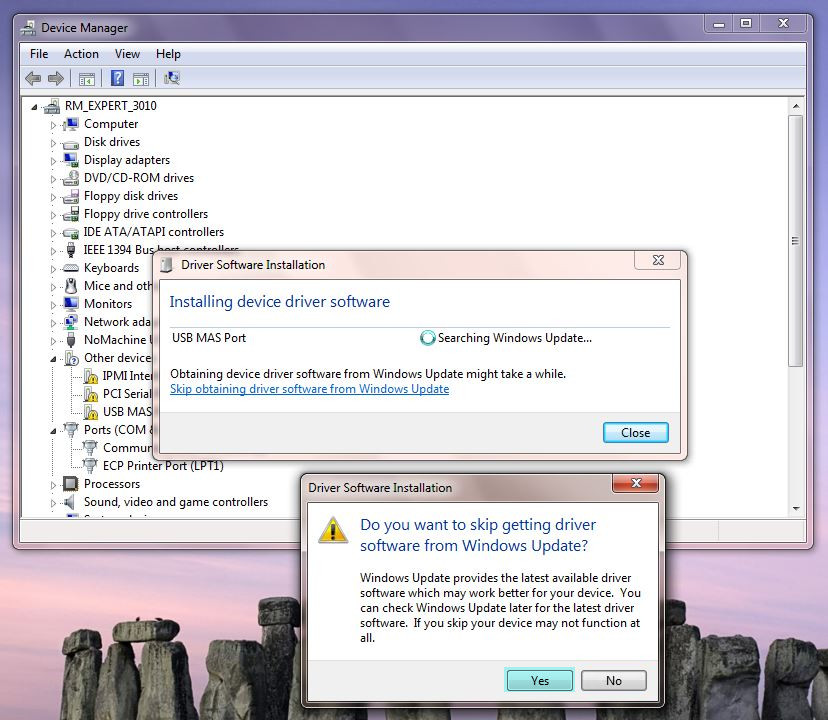
Unplug the USBMAS box and then re-insert it. The PC will
probably start to re-install the drivers just uninstalled!
This needs to be stopped immediately. Click the Skip
obtaining driver software from Windows Update link and
click YES as shown in the slide below and wait for Windows
to give up
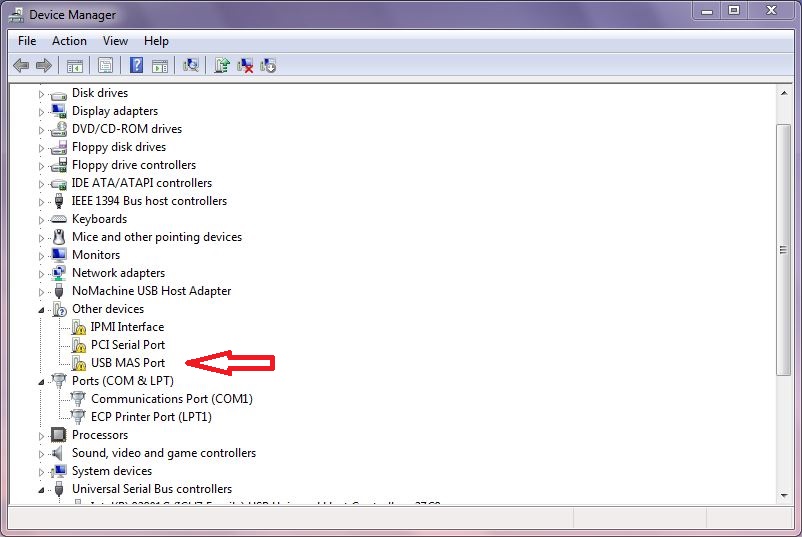
Unplug and re-insert the USBMAS box. The following slide
shows the Device Manger. The RED
arrow shows the USBMAS box device with no driver
installed.
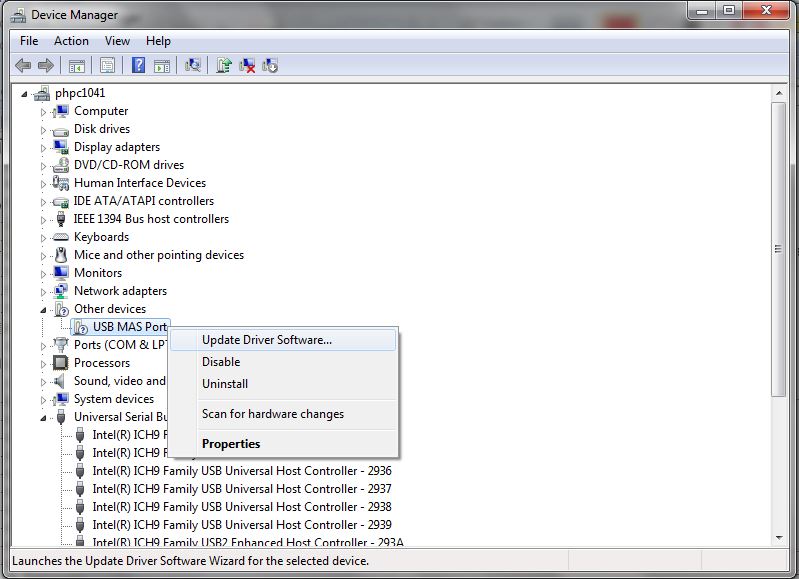
The following slides show the installation process. The
USBMAS box should be plugged in and the Driver manager should list
the USBMAS device labeled with a (?) or (!) tag as shown in the
slide above or below.
Right-Click and select Update Driver Software.
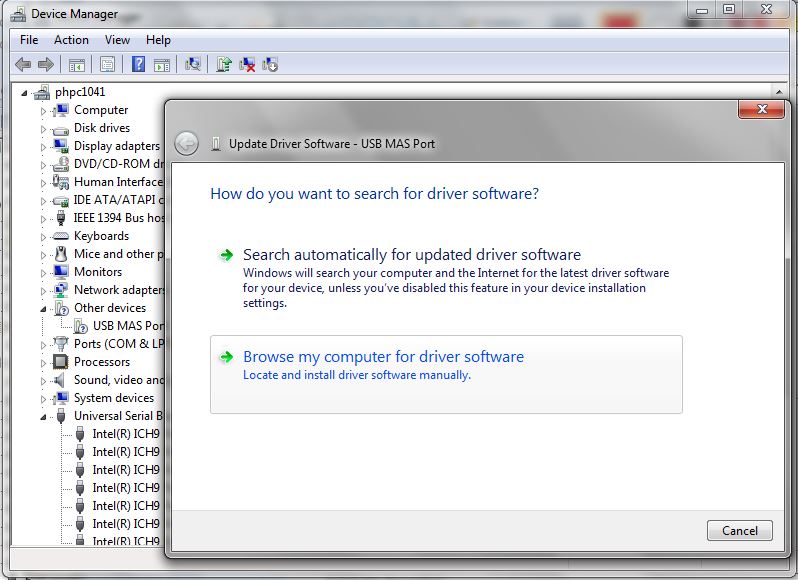
Choose Browse my computer for driver software.
Enter (ie. copy&paste from above) the network UNC for the path
to the driver files as shown below and click Next.
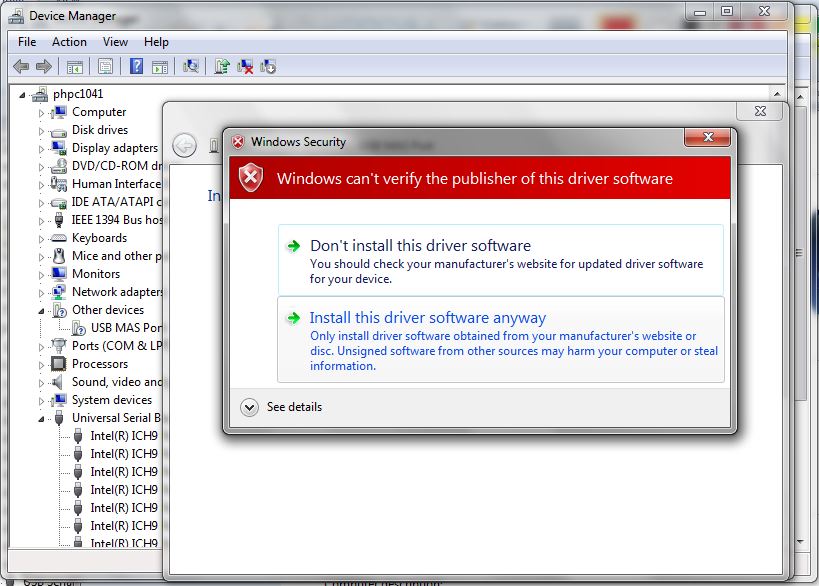
The USBMAS driver is not signed by Microsoft so select Install
this driver software anyway.
The PC is now installing the driver...
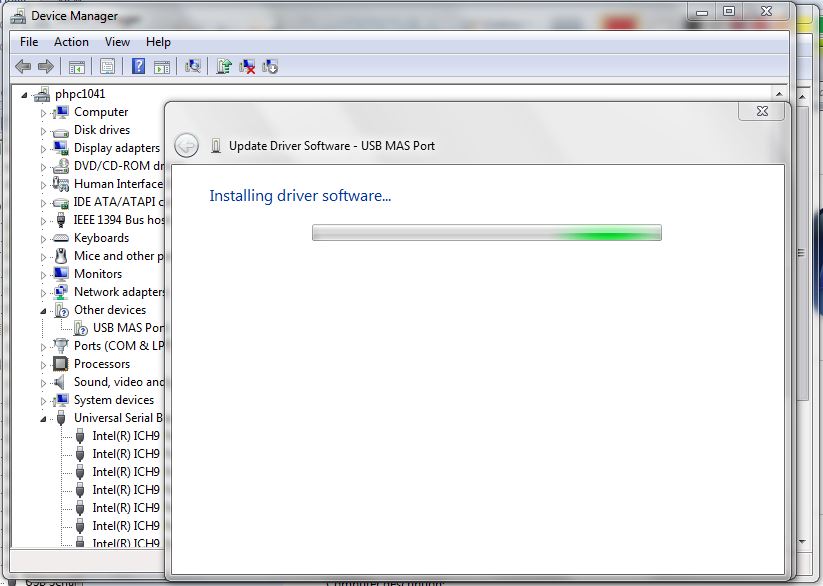
Driver installation is complete. Click Close.

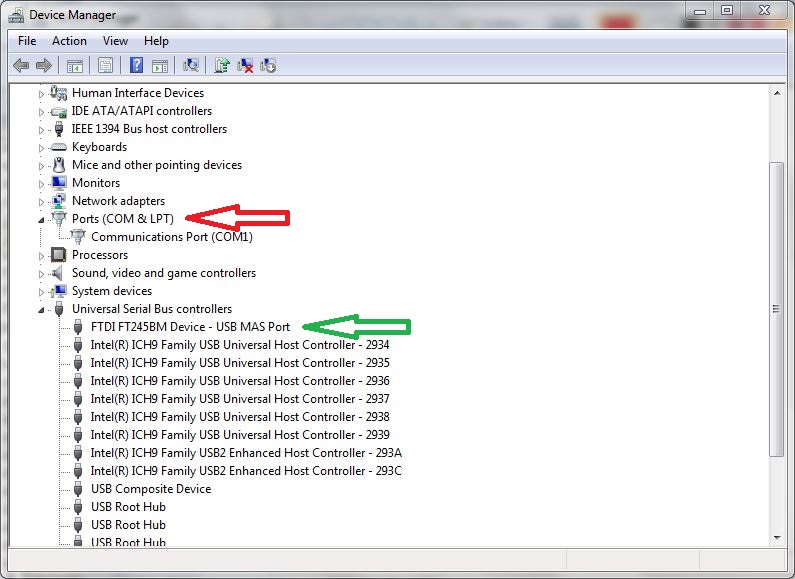
The GREEN arrow shows the correctly
installed driver. The RED arrow
indicates no virtual COM ports associated with the USBMAS device
have been installed, which is correct.
The installation procedure is the same as for the 32-bit version
once some preliminary items have been done. These are
required because paranoid Windows system developers at Microsoft
have enforced the driver signing requirement in the 64-bit version
rather than ask the user whether they wish to install an unsigned
driver. This idiotic measure is bit inconvenient for small
in-house outfits such as ourselves who wish to write/modify our
own drivers and install them without sending them off to Microsoft
WHQL for signing and paying for the privilege.
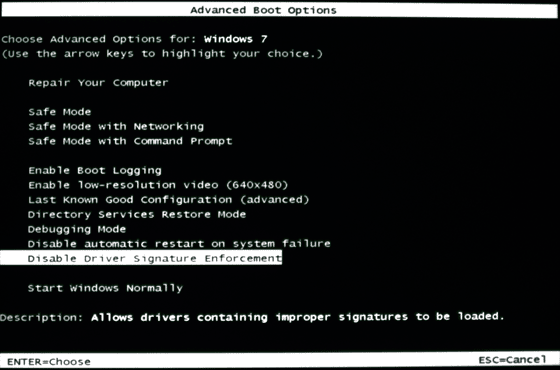
There are a couple of workarounds: One is to press F8 at
boot time and select the Disable Driver Signature Enforcement
option as shown below. This will have to be done each time
the PC is booted.
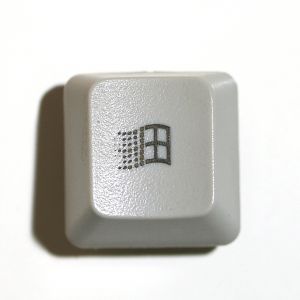 together with the R key, enter CMD into the box and click OK.
The next slide shows the bcdedit commands to be typed, highlighted
in GREEN and the key before &
after settings in YELLOW.
together with the R key, enter CMD into the box and click OK.
The next slide shows the bcdedit commands to be typed, highlighted
in GREEN and the key before &
after settings in YELLOW.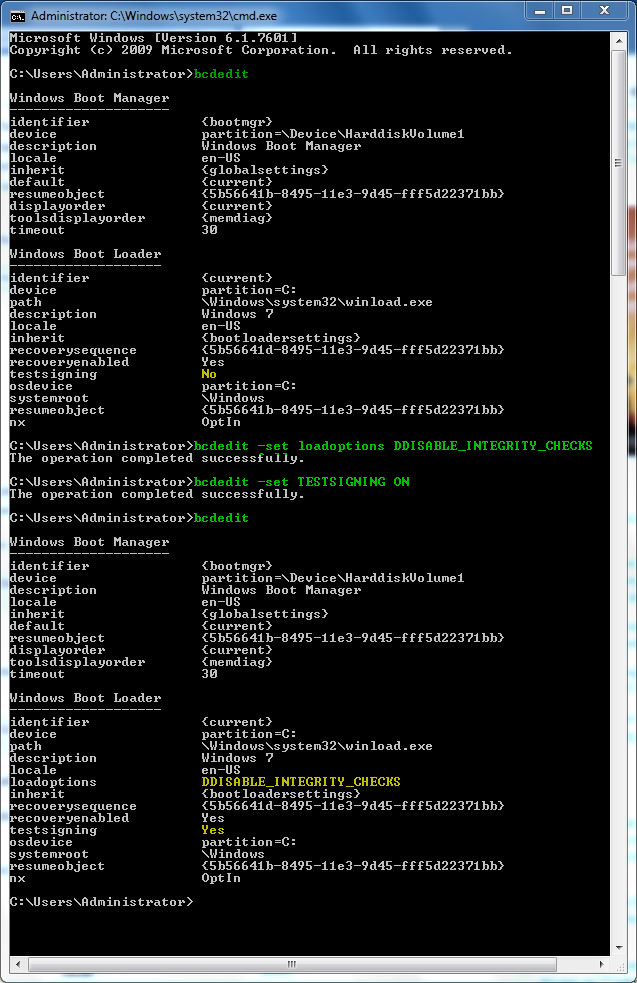
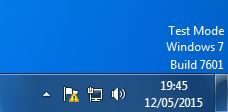
Windows 7 should confirm the above changes to its settings on the
desktop, above the System Tray similarly to as shown here,
With the driver signing enforcement bypassed the installation
procedure is the same as above for 32-bit Windows 7.
On certain 64 bit Windows 7 machines I was unable to perform the
above bcdedit edits and the driver installation even as a user
with Administrator rights. Instead it was necessary to use
the local Administrator account. Most machines have a local
Administrator account but it is usually disabled. To enable it,
logon as a user with Administrator rights and use the Control
Panel to navigate to, Control Panel --> All Control Panel Items
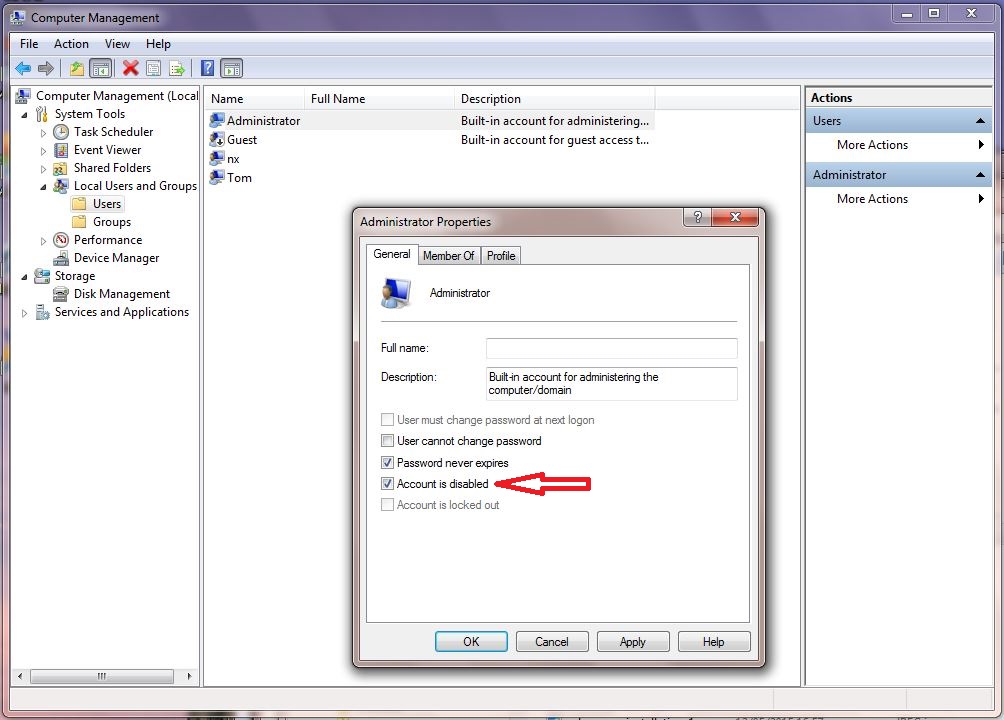
--> Administrative Tools --> Computer Management -->
Local Users and Groups --> Users --> Administrator.
Then untick Account is Disabled as indicated by the RED arrow. Click Apply and OK.
If not requested to set a password for the Administrator account
it, it is a good idea to do so at Control Panel --> All Control
Panel Items --> User Accounts --> Manage another account
--> Administrator --> Create a Password. It should now
be possible to logon as the local Administrator and perform the
bcdedit and/or installation stages.
Note: It may help navigating with the Control Panel to change it's default "View by: Category" setting (top RH corner) to "View by:" Large Icons or Small Icons.
T.Crane, 28th May 2015.