Home > IT Services > IT FAQs > CampusAnywhere (VPN) manual set up on Win 7 - What are the steps?

CampusAnywhere (VPN) manual set up on Win 7 - What are the steps?

Question:
CampusAnywhere (VPN) manual set up on Win 7 - What are the steps?
Answer:

The following CampusAnywhere (VPN) instructions are for Windows 7, but the procedures for Windows Vista and Windows XP are very similar.  In Windows XP, Go to Network and Internet in Control Panel to find the option to set up a new VPN connection.


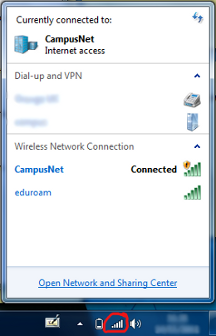
To set up the VPN connection open the Network and Sharing Centre from the Control Pannel or via the Internet Access icon on the botom right of the taskbar:

vpn7-1

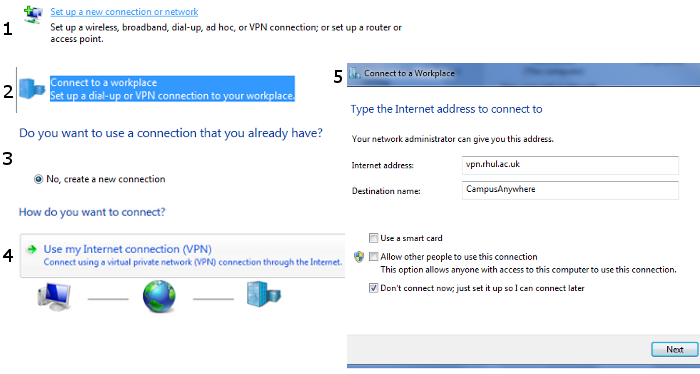
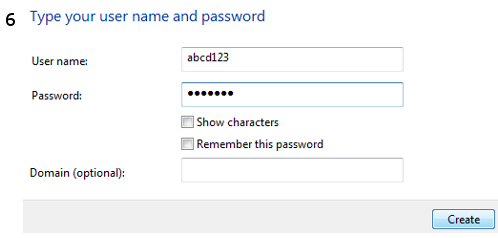
Then follow these steps to make the connection:

vpn7-2-6

vpn7-7

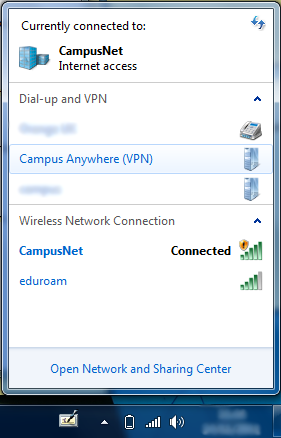
Now you can connect to the Royal Holloway network from anywhere with an internet connection via the internet access icon:

vpn7-8


Comment on this page

Did you find the information you were looking for? Is there a broken link or content that needs updating? Let us know so we can improve the page.

Note: If you need further information or have a question that cannot be satisfied by this page, please call our switchboard on +44 (0)1784 434455.

This window will close when you submit your comment.

Add Your Feedback
Close|